Tag Archive for: compositing

Spaceship UFO VFX – Tutorial

Download HD UFO VFX Assets Here

Whether they’re friendly or not (usually the latter), no Sci-Fi movie is complete without alien spaceships flying over a city. They’re some of the coolest VFX shots out there.

We’re super happy to be introducing these new HD UFO effects, all available for you to download! We even have a free option, so this tutorial is for all of you.

Inspired by Independence day, District 9 and Arrival, we want to show you how you can create your own blockbuster CGI alien spaceship. So let’s get started with the tutorial!

You can use almost any compositing software for this tutorial, whether that’s Nuke, Hitfilm, or Premiere Pro. I’ll be using After Effects!

We’ll first need the city that our outer-worldly visitors will be hanging out over. I’ve gone for the popular choice, New York City! You can download the same image here from Pexels.

Download UFO Spaceship VFX Tutorial

You can apply the same VFX techniques to a video if you would rather use that! If you haven’t yet downloaded the UFO assets, download the effects here.

We can drop our first spaceship into our shot! You’ll find that it’s already looking incredibly realistic without any work needed to be done. FootageCrate elements are all designed to make your workflow as easy as possible!

The first adjustment we want to make is ensuring that the lighting is in the correct direction. You’ll see that the sunlight is coming from the left side of the screen, so if the UFO asset doesn’t match, simply flip it horizontally. This makes the scene seem consistent.

Download UFO Spaceship VFX Tutorial

The next small adjustment we can perform is adding a tint effect. Make both colors match the sky, so that the UFO appears to be distant in the sky. Typically, you’ll increase the tint if the spaceship is larger or further away to give a sense of scale.

Download UFO Spaceship VFX Tutorial

Feel free to go crazy and add even more of our spaceship assets! Once again you can change the tint levels so that the closer spaceships have less of it applied (which you can see in the top right asset).

Download UFO Spaceship VFX Tutorial

If you have buildings that are supposed to obstruct the view of some of these VFX assets like I have here, you can either rotoscope the foreground, or use a simple color key with the sky as the target! We can then use this duplicated layer above our UFO effects to put the buildings in front.

Download UFO Spaceship VFX Tutorial

And it’s as easy as that! In no time we have our VFX UFO invasion underway. Add any final corrections you would like to your scene. I’ve even used our Auto-Cinemabar plugin to quickly create the cinema aspect ratios in a single click!

Download UFO Spaceship VFX Tutorial

We’ll love to see what you create with these UFO VFX assets! If you’re tempted to create your own UFO animations, Pro Users can download our model here.

If you’re interested in more compositing tutorials, check out our Helicopter tutorial.
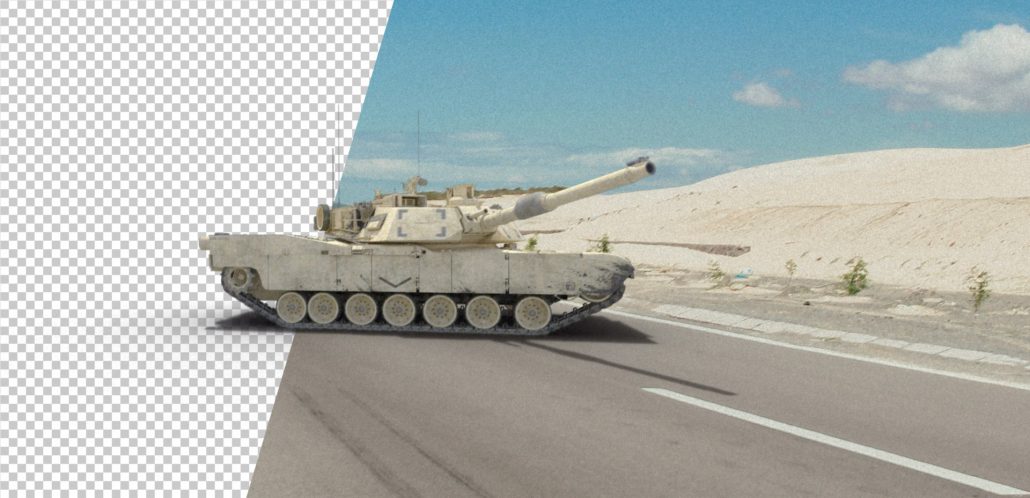
Download Tank VFX Assets

Download HD Tank VFX Assets Here

Our hugely requested and highly anticipated tank effects have rolled in!

We love seeing tanks and huge military battles in movies. This is why we’re now giving you control of over 30 unique and exciting elements to bring mayhem to your action film without the huge price tag!

Aiming, rolling, turning and even firing are all included in this huge collection, meaning you can combine these in your timeline to create an entire army of these tanks.

Our effects are all pre-keyed with an alpha channel, meaning you can easily insert these into a shot instantly without any extra hassle.

Download HD Tank VFX Assets

We’ve also created different lighting variations, so whether your shot is sunny or overcast, our assets will have you covered.

For those who want to go to war with these effects, we’ve created impactful tank firing shots from several different angles.

Download HD Tank VFX Assets

You can order these different effects so that you can create a realistic narrative, such as having a tank rolling up to the camera, aiming, and then firing… The possibilities are limitless!

We hope you enjoy using these tank effects in your projects. If you’d like to expand your arsenal, check out our action-packed helicopter VFX assets.

How to add Snow to your videos – VFX Tutorial

Download HD snow effects for your videos here

With only a few days to go until Christmas takes over, it’s time to go over one of the most fundamental uses of VFX compositing – snow!

Whether you’re shooting a Christmas comedy or a reflective and chilling scene for your film, snow can always help add value to your project. But not everyone has access to weather manipulating machines or industrially sized snow cannons, and so in these cases, we must rely on VFX to composite the snow into our footage.

FootageCrate has a huge library of snowfall effects, ranging from realistic to cartoon styled. Similar to all of our content, these snow effects are pre-keyed, meaning that transparency is preserved when you drop the snow footage on top of your shot without any further hassle! You can take a look at our collection of snow effects here.

Let’s get started with the tutorial! You can use almost any software for this, including After Effects, Hitfilm, Nuke and Premiere Pro!

I’ve taken this stock image from Pexels.com, so if you want to follow along, be my guest and download the image.

How to composite snow VFX into your video tutorial

One step I’ve often seen people skipping is that they don’t add depth to their snow effect. What I mean by this is that it’s quite clearly visible that there’s just a snow effect simply being placed on the footage, giving it a “flat” feel. We’re going to give the snow volume by first creating a solid that matches the colour of the lighter clouds, and making it so that the further away the footage is, the higher the opacity. This can be done through masking or opacity painting.

How to composite snow VFX into your video tutorial

Already we’ve given a nice volumetric feel to the scene. This will look like snow that is too distant to be seen by the camera individually, and so appears like a cloud.

We can now mask out or rotoscope the foreground so that it doesn’t sit behind this fog.

It’s now time to drop the snow effect into our video. I’ve taken two different effects from the FootageCrate website, which is the “snow background” and the “slow snow falling”. I’ll have the first placed behind the foreground, and the second in front of it. This makes it appear as if the subject is sandwiched between the two snow assets so that they feel part of the scene!

How to composite snow VFX into your video tutorial

Apply these snow effects with an add/lighten/screen transfer mode so that the dark halos around the snowflakes are invisible, and admire your now far more chilling scene! You can add further colour corrections to then cool the image with bluish tints.

How to composite snow VFX into your video tutorial

Thanks for reading this tutorial! If you’d like to learn more VFX, take a look at our helicopter compositing tutorial!


Helicopter VFX Tutorial

Download HD Helicopter VFX assets here

Our brand new helicopter assets have landed in the FootageCrate library, giving you the power to create your own stunning action movie VFX!

Over 30 exciting elements are available for you, with some of them being free to download. We’ve made sure the selection covers all of the intense helicopter sequences you’ll need to build the perfect narrative for your project.

The collection includes take-offs, flybys, static graphics and even a spectacular helicopter crash.

Helicopter Crash VFX for your Videos

It’s time to get started with the tutorial, so you can learn how to add these helicopter VFX into your own videos! We’ll be going over the general workflow which covers the steps you need to take to composite all of our helicopter assets. I’ll also be using After Effects today, but you can replicate the steps in almost any compositing software such as Hitfilm and Nuke.

We’ll first need a background, which today will be this beautiful aerial mountain scenery from Pexels, but feel free to use your own!

Helicopter VFX Tutorial Background

Once you’ve created a composition featuring your background, find a helicopter asset that best suits your shot. There’s many to choose from, so you’ll have no trouble finding one that you want. I recommend that you also consider the lighting when deciding which effect you want for your VFX. Here I’ll be using a looping shot from the side:

Download Helicopter VFX Assets

Drop the effect into a new layer of your composition, and position it where you need it. Since the background and the helicopter don’t have matching sources of light, I flipped the landscape horizontally in order to have the light coming from the same direction. This goes a long way when it comes to making sure your effect fits naturally into your scene!

Helicopter VFX Tutorial

The shot is already looking pretty good, but we’ll perform some colour correction to make it perfect. I used a curves effect to lightly decrease the red as well as increase the blue, which matched the chilling tone of the environment.

Download Helicopter VFX Tutorial

No action scene is complete without some background motion blur, which also gives the illusion that the helicopter is moving at great speeds. It also helps highlight the main feature of our shot, so that it stands out from the rest.

Download Helicopter VFX Tutorial

This is the third tutorial in a row which has made use of our ProductionCrate Lightwrap generator, so if you haven’t checked it out already download it here! This tool is an absolute game-changer when it comes to compositing inside After Effects. It takes the colour of the environment and blends it into the edges of the asset, making it seem as though light from the scene is bouncing off our helicopter and into the camera. The default settings will do for most scenes, so hitting “Generate” should do the trick, but feel free to adjust the settings if needed.

Download Helicopter VFX Tutorial

You’ve made it to the end! We now have a photorealistic helicopter VFX effect in almost no time at all thanks to ProductionCrate’s helicopter library. It’s time to add our final colour corrections to give it the cinema-quality tone we want to see (here I had increased the contrast and saturation).

Download Helicopter VFX for your Movie

If you want to learn even more compositing tricks, take a look at our Nuclear Bomb VFX tutorial:

Fluid Ink Transition Effects

Download 4K HD ink fluid effects here.

Video transitions are one of the critical aspects of editing, connecting two different shots together. Since the dawn of digital editing, we have seen creators begin to take transitions even more seriously than before, especially in the vlog format.

Whip-pans, spins, fades and light leaks have all become a popular choice for Premiere Pro editors, but one other is a particular favourite of ours. Fluid transitions!

4K Fluid Ink Transitions for Premiere Pro

Otherwise known as ink bleeds, these can be some of the most stylish and beautiful effects, and add a whole new dynamic to your video.

To make your own, you’ll need three things. Your clips, an editing platform, and one of our fluid ink transition effects (which you can download here).

4K Fluid Ink Transitions for Premiere Pro

It’s then as simple as setting your clips alpha to match the brightness) of our transition effect. This can be done by placing the effect above your second clip and adding a “Track Matte Key” to the clip you’re fading into. You then select the ink-effect in the “Matte” option.

4K Fluid Ink Transitions for Premiere Pro

4K Fluid Ink Transitions for Premiere Pro

The “composite using” is what this effect uses to calculate the alpha value of the second clip, and since our ink effect is black and white, we’ll be using the luma value as our source.

Have fun with these awesome 4K ink fluid effects. If you want to hear about more ways you can use our range of effects, take a look at our blog!

Zombie VFX Compositing Tutorial!

Download HD pre-keyed zombie VFX assets here

Continuing from a recent post showcasing our zombie effects, it’s time to put them into action with a quick tutorial!

For the readers who have just joined us, welcome! FootageCrate has a bundle of truly extraordinary stock footage of green-screened and pre-keyed HD zombie effects. This means that you won’t need any fancy make-up artists and actors for your own zombie movies, instead, you can easily composite them into your videos with a few clicks for an unbelievably realistic effect and low budget!

I’ll be showing you an example of how you can add these zombie apocalypse visual effects to your footage to make them look like they are truly part of the scene in After Effects.

If you want to follow along, I’ve taken a stock image from Pexels.com which you can download here.

Download and composite zombie VFX to your video

As for our zombie VFX assets, you can find them all on our category page here. Many of these are free to download if you want to try it out with no cost at all, and Pro members can download the entire collection of pre-keyed 4K assets. Let’s get started!

The easy part is to drop your zombie VFX characters into your footage. I used a feathered mask to cut out the lower portions of their legs so that it appeared they were standing in the middle of the tall grass and fog.

Download and composite zombie VFX to your video

If we take a closer look, you will notice that these zombies look rather “flat”. Perhaps as if they’re paper cutouts stuck onto an image. Luckily for us, we have the solution!

Download and composite zombie VFX to your video

Recently we released the truly-incredible Light Wrap generator. You won’t believe how important this After Effects script is for creating stunningly realistic compositions. It creates a feathered halo glow around the inner edge of our foreground, giving it the appearance that the light is interacting with our zombie VFX foreground. And it’s free for all users! (Thank you, Nate!)

Pre-compose all of our zombies together, and run the Light Wrap generator script. Select the zombie composition as the foreground, and the photograph as the background. Suddenly, once you change a few of the settings in the controls, you’ll have a stunning result. I find that the radius and brightness controls play the most important part in finding the right look for your scene.

Download and composite zombie VFX to your video

And without any trouble, we have an insanely realistic looking zombie in our shot! Apply some final colour corrections, and you can proudly admire the work you’ve created.

Composite zombie VFX with a Light Wrap

If you want to have a go at some more compositing, take a look at our Nuclear Explosion tutorial!

Zombie VFX Extras

With Halloween approaching, it’s time to make your videos extra spooky!

ProductionCrate has now made it possible to create your own zombie apocalypse movie with a near-zero budget. You don’t need hundreds of extra actors, in fact, you don’t need any at all. Instead, we have a huge collection of 4K pre-keyed (and green-screen) zombie character effects.

Download HD Zombie Effects Free

We recorded several different actors performing hundreds of different actions that you would expect to see from the typical walking-dead. Standing, stumbling, reaching, and even attacking. To help make your heroic protagonist interact with these characters, we’ve included reaction-actions, such as getting hit by a bullet. This will give your project a life-like appearance without any trouble!

Duplicate, scale and spread your zombies around across your scene to create an entire horde of them. The fantastic Adrian Jensen goes into the steps on how you can do this in this tutorial using After Effects and Trapcode Particular.

Zombie VFX Extras are available for download here.


HD Blood VFX Collection

Download HD blood impact VFX assets here

Halloween is approaching, which is the perfect time to think about the spooky areas of VFX, like blood! It has always been very close to our hearts when working in special effects. Producers tend to want to keep their actors alive, and so studios must find ways to recreate these gore-filled sequences using safer methods.

You’ve probably heard of the classic squib! These are miniaturised air cannons which can be remotely set off, forcing blood-coloured fluid effects into the air. This creates the illusion of a bullet impact! However, these can be expensive, timely to set up and will ruin whatever you’re wearing. This is why the industry has been shifting more towards compositing these blood effects digitally using VFX.

Blood Squib FX

This shot featured in our “Put a gun through a hand” tutorial did exactly this. We used blood explosion assets which are all available to download on FootageCrate. We even have free blood impacts as well, so there’s nothing to stop you from turning your movie into a gruesomely realistic action adventure!

Our HD pre-keyed blood explosions are easy to composite, it’s as simple as dragging and dropping the effect into your video using any compositing software. Popular ones to try are Adobe After Effects, Hitfilm, and Premiere Pro which are all accessible to learn from our countless tutorials.

After hosting this content for more than 8 years, we’re proud of our blood splatter VFX, and we hope you have great fun using these in your video.


Nuclear Bomb VFX Tutorial

A few days ago we covered creating a missile launch VFX shot. But now it’s time to take a look at the receiving end of the attack and build out one stunning looking explosion!

If you’re new around here, welcome! ProductionCrate is your friendly-neighbourhood source for creative assets, ranging from VFX, sound, music and motion graphics. We have thousands of professionally made effects ready for you to download today, and one of them is our much-loved nuclear bomb explosion which you can download here. We have plenty to choose from, many of them are free to download, so pick your favourite and we’ll jump into the tutorial.

From past experience where I’ve tried to composite nuclear bombs and other large explosions into my video, one of the most difficult steps is correctly creating the lighting. Usually, this is done by masking out dozens or even hundreds of different surfaces which will reflect your explosion. This can easily take up hours of your time just perfecting it, especially if you have movement involved.

So I offer my secret solution to the perfect lighting; shoot during sunset!


This will create the lighting you need in no time, casting a fiery glow across the sky. I’ll grab my scene from here, which looks perfect with the skyline being silhouetted by the brightness of the sun. You can use this too unless you have your own!

I’ll be using Adobe After Effects (should have used Nuke!), but the same processes can be applied to any compositing software, even Premiere Pro or Hitfilm.

Create a VFX Nuclear Explosion Tutorial

If you downloaded the sample image, you might notice I’ve made a few changes (mostly because I didn’t want that gigantic building in the way of the explosion). Feel free to Photoshop it around a little to best fit your artistic needs. We’ll first need to quickly create a foreground mask, but thankfully we can use a luma-key or the Extract tool to only keep the dark areas of the shot, which are the buildings.

Create a VFX Nuclear Explosion Tutorial

Download our nuclear explosion VFX asset (available for free users too), and drop it into your scene roughly where the sun is.

Create a VFX Nuclear Explosion Tutorial

If you’re thinking that this doesn’t look natural at all, then you’re perfectly right. We need to match our smoke to the colours of the sky and what better way to do it than with our favourite tint effect. Use the colour pickers to select the horizons colours, preferably where the object you are selecting is black in reality, but obscured by the atmospheres glow. This should perfectly blend it to match the ground.

Create a VFX Nuclear Explosion Tutorial

To bring back the flames, duplicate the layer and clear the effects. We then need to use a simple extract/luma key to remove the smoke. Set the layer’s blending mode to Screen, and our blast will already looking great!

Create a VFX Nuclear Explosion Tutorial

And as always, bombard our flames with a bundle of wonderful glow effects!

Create a VFX Nuclear Explosion Tutorial

The next step is optional, but I love the extra intensity it gives the brightness of the explosion. Duplicate the foreground layer of the buildings, and apply a Light Burst effect to it, centring the origin to the explosions centre. It will cast these immense volumetric shadows through the atmosphere and looks fantastic!

Create a VFX Nuclear Explosion Tutorial

It’s up to you know to stylize the scene as much as you would like, but in the end, we should have a magnificently epic explosion!

Create a VFX Nuclear Explosion Tutorial


Using our Puddle Maps!

If you’re reading this, there’s a chance you’ve stumbled upon our puddle map collection and wondered, “What on Earth are these for?”. You’re not alone!

If you’ve had some experience with 3D design, you may be familiar with “glossy maps” or “reflection maps”. These are textures which can tell rendering software how “shiny” an object is. Think of a white texture being for a mirror (very shiny), and a dark gray texture used for concrete (very dull and matted). We discovered we can use these in After Effects to create utterly-realistic reflections to help composite VFX into your scene, or just make it visually incredible. You may have seen Andrew Kramer’s Video Copilot tutorial which involved a similar process.

We have dropped one of our fire VFX assets (found here) into our street, but anyone can see it is looking pretty dull at the moment! Our mission is to make this look both realistic and more visually interesting!

Puddle Tutorial Part 1

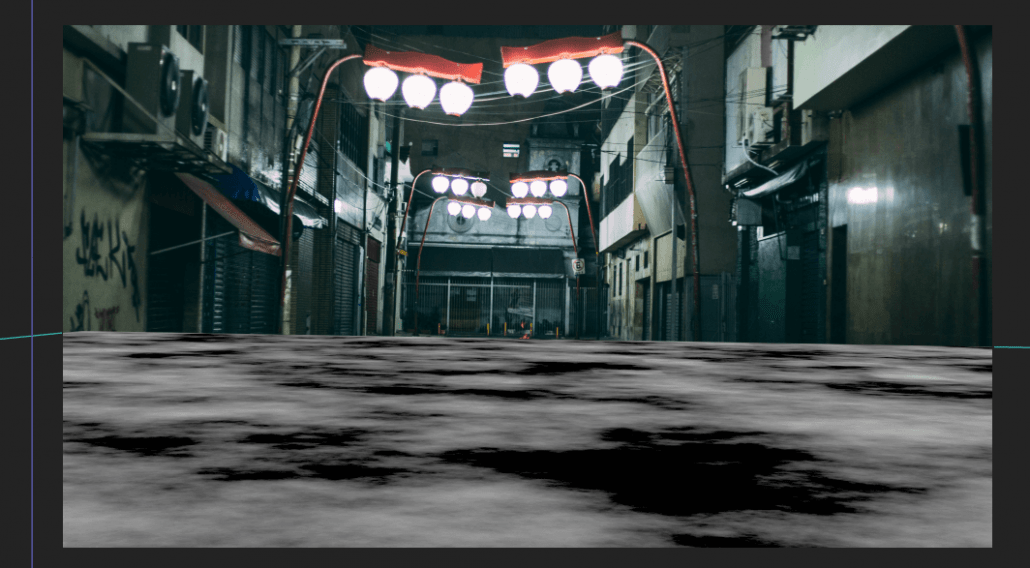
We will then need one of our puddle maps. There are different varieties (such as asphalt, tiles, road surfaces and more), so choose which one best fits your shot. Drop it into your scene, make it 3D, and align it with your ground:

Puddle Tutorial Part 2

Here is where you might see where this is going! Duplicate any of the layers you want to reflect in the puddle. In this case, the fire and the backdrop. We’ll name them the same but with “Reflection” at the end. Pre-compose the puddle map as well.

Puddle Tutorial Part 3

For each of the “Reflection” layers, flip it vertically and position it in a place where it would approximately match what it would look like if the floor was a gigantic mirror. Here’s my attempt (with the walls roughly masked out):

Puddle Tutorial Part 4

(Same process with the fire)

Puddle Tutorial Part 5

You then want to pre-compose these newly reflecting layers, all into the same composition. We’ll now be looking at something like this in our layer panel:

Puddle Tutorial Part 6

Now for the magic moment! Apply the “Compound Blur” effect to our reflection layer. The compound blur effect is similar to a traditional blur, except it blurs an image with its blur strength dependant on another texture (so brighter areas are blurred more than darker ones). Set our blur layer to our Puddle Map, and turn up the Maximum Blur parameter. You’ll quickly see everything fitting into shape!

Puddle Tutorial Part 7

Puddle Tutorial Part 8

It may take a little bit of experimentation since no project is the same. For example, setting this layer to an Alpha Inverted Matte might fix some issues you may have to your scene. You can even try using different puddle maps from the range in our collection.

You can then mask out any areas you don’t want a blur to appear on, such as these posts which are trying to make our life difficult.

Puddle Tutorial Part 9

Lastly, as we have a fire in our scene, it’s mandatory to add a glow effect (we can go deeper into this in another tutorial!).

Puddle Tutorial Part 10

Hopefully, this clears up any questions regarding these puddle maps! These things are powerful tools for any compositor in VFX or design, and will always give your scene an extra breath of photorealism. We hope you enjoy using them!

Puddle Map and Fire Tutorial in After Effects

Did you enjoy this guide? You might also like to read about our bullet hole collection!