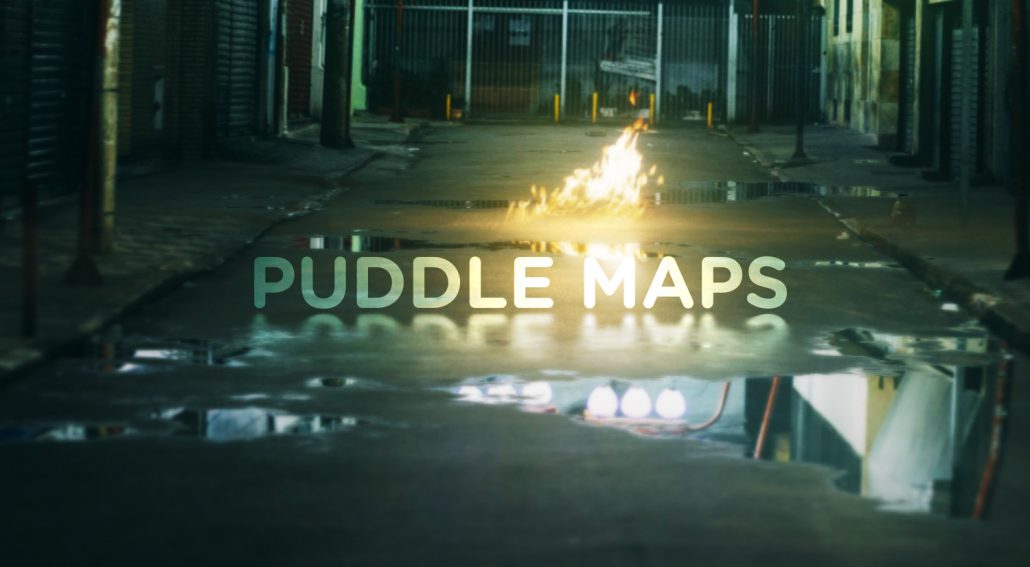
Using our Puddle Maps!
If you’re reading this, there’s a chance you’ve stumbled upon our puddle map collection and wondered, “What on Earth are these for?”. You’re not alone!
If you’ve had some experience with 3D design, you may be familiar with “glossy maps” or “reflection maps”. These are textures which can tell rendering software how “shiny” an object is. Think of a white texture being for a mirror (very shiny), and a dark gray texture used for concrete (very dull and matted). We discovered we can use these in After Effects to create utterly-realistic reflections to help composite VFX into your scene, or just make it visually incredible. You may have seen Andrew Kramer’s Video Copilot tutorial which involved a similar process.
We have dropped one of our fire VFX assets (found here) into our street, but anyone can see it is looking pretty dull at the moment! Our mission is to make this look both realistic and more visually interesting!

We will then need one of our puddle maps. There are different varieties (such as asphalt, tiles, road surfaces and more), so choose which one best fits your shot. Drop it into your scene, make it 3D, and align it with your ground:

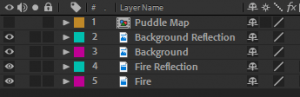
Here is where you might see where this is going! Duplicate any of the layers you want to reflect in the puddle. In this case, the fire and the backdrop. We’ll name them the same but with “Reflection” at the end. Pre-compose the puddle map as well.
For each of the “Reflection” layers, flip it vertically and position it in a place where it would approximately match what it would look like if the floor was a gigantic mirror. Here’s my attempt (with the walls roughly masked out):
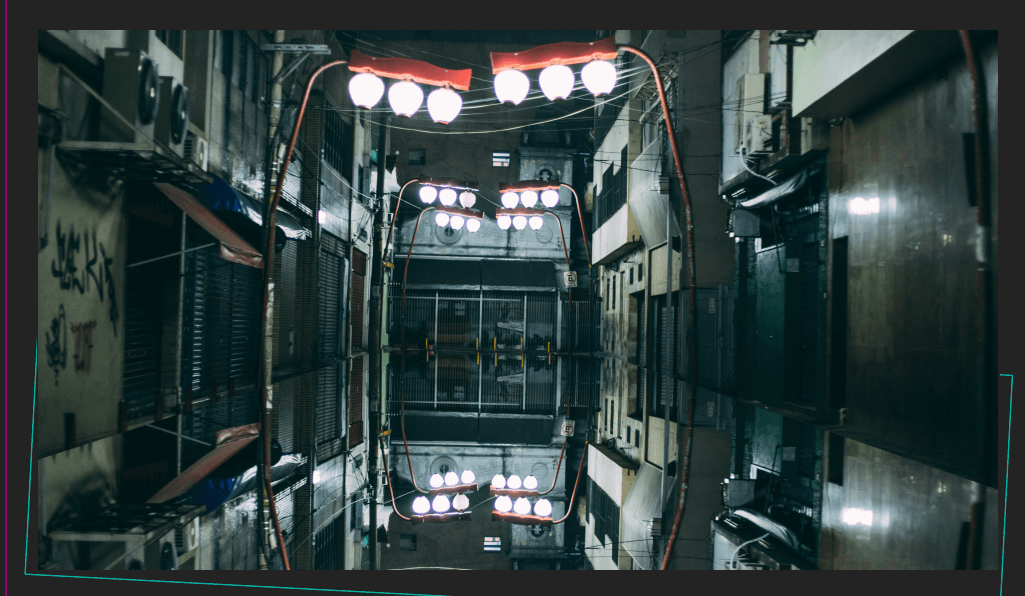
(Same process with the fire)

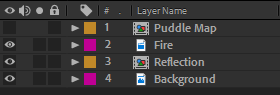
You then want to pre-compose these newly reflecting layers, all into the same composition. We’ll now be looking at something like this in our layer panel:
Now for the magic moment! Apply the “Compound Blur” effect to our reflection layer. The compound blur effect is similar to a traditional blur, except it blurs an image with its blur strength dependant on another texture (so brighter areas are blurred more than darker ones). Set our blur layer to our Puddle Map, and turn up the Maximum Blur parameter. You’ll quickly see everything fitting into shape!
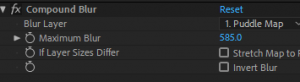
It may take a little bit of experimentation since no project is the same. For example, setting this layer to an Alpha Inverted Matte might fix some issues you may have to your scene. You can even try using different puddle maps from the range in our collection.
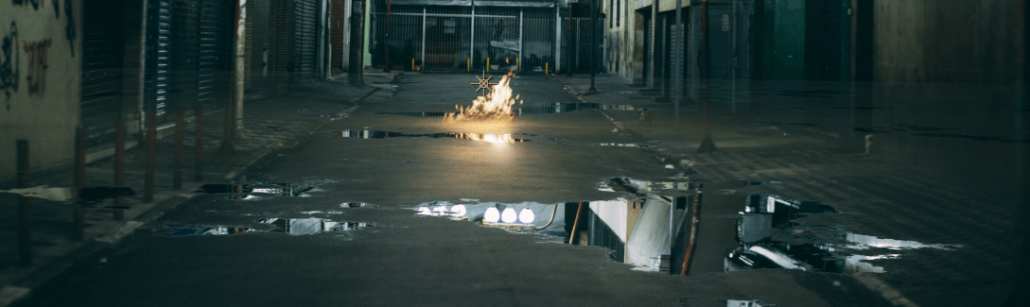
You can then mask out any areas you don’t want a blur to appear on, such as these posts which are trying to make our life difficult.
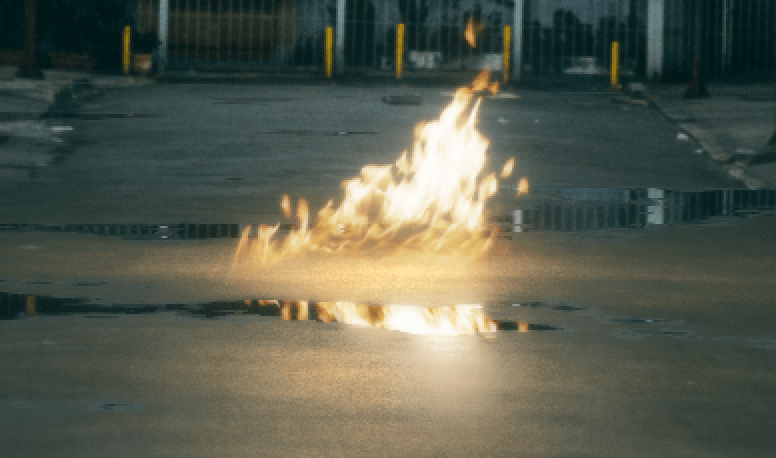
Lastly, as we have a fire in our scene, it’s mandatory to add a glow effect (we can go deeper into this in another tutorial!).
Hopefully, this clears up any questions regarding these puddle maps! These things are powerful tools for any compositor in VFX or design, and will always give your scene an extra breath of photorealism. We hope you enjoy using them!

Did you enjoy this guide? You might also like to read about our bullet hole collection!


