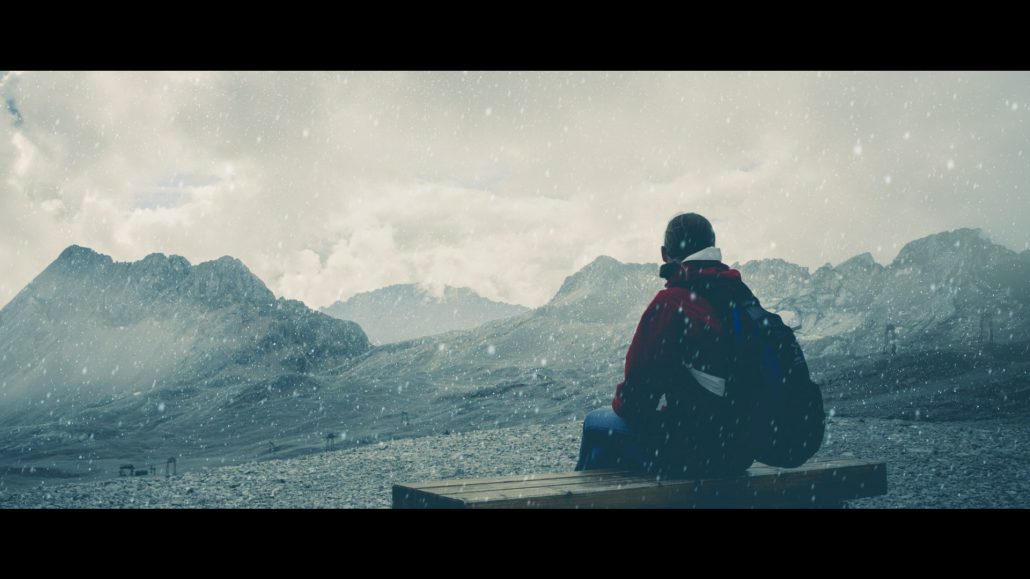
Hidden Visual Effects

Story: The Great Unseen Equalizer in VFX

There is an art to using VFX as an unseen tool. So much consideration goes into the curating of what you, the viewer, see at any given moment, that it is easy to forget about what you don’t see in a shot. But more often than not, what you don’t see is where the best and most impactful story moments lie.

In VFX, just because we can do anything and everything doesn’t always mean we should. So often audiences and media focus on what we can see and what is shown on screen in VFX. When The Avengers and Game of Thrones are the baseline for visual excellence, the bar is pretty high. Freeze frame any moment from those shows and the still image is a renaissance painting.  (Unless there is Starbucks cup.)

But ultimately consideration for VFX emerges from a directorial, editorial story perspective. A visual should not exist simply for the sake of existing.

Curious about what are some of the ways to use VFX with restraint or purpose in more subtle and useful ways?


Back to the Basics and Classics

A sense of film history is the best tool you can use when figuring out your shot. Think back to a world of Alfred Hitchcock and Rod Serling; a world of storytelling where it is not so much what you show, but what you don’t and how that restraint can serve the better purpose of your story.

Take for example, one of my most favorite episodes of The Twilight Zone, Eye of The Beholder (Watch it on Hulu.)

The Twilight Zone was created during the infancy of television, an episode conceived in 1960, almost 60 years ago. In Eye of the Beholder, the filmmakers obfuscate, misdirect, and use light and contrast as an unspoken character. The claustrophobic visual language creates a foreboding slow build, leading to a masterful, gasp worthy reveal.


Yet, you would think that since it’s almost 100 years old, it should be primitive in its filmmaking, with all that limitation of technology. Rather the opposite,  Eye of the Beholder manages to pack a gut-punch allegory on Nazism and conformity, against the backdrop of a totalitarian state, using mostly shadows, concerted camera movement and actors backs to camera. Even with such heady topics, nothing in the production feels cheapened, nothing feels lost to age, it holds up remarkably well as a gem of perfection.


With just light and camera direction The Twilight Zone achieves masterful commentary about the perceived value of homogeny in beauty. What we, the viewer, don’t see informs the story just as much as what we are allowed to see. This gives so much weight to the double-blind reveal. What does her face look like? Is she a monster?! What do the doctors look like? Eye of the Beholder remains riveting and engaging television by any modern measure. If they can do that with so little, there’s nothing you can’t do.


Technically Difficult and Time Consuming? Yes, if it serves story.

Way back in 1948, Alfred Hitchcock audaciously sought to create a seemingly single take film.  Rope was an amazing and difficult orchestration, with entire magazines of film taking up the length of each take. Hitchcock’s use of “the television technique” was unheard of and novel and considered by many “daring” for a mainstream director at the time.

This single take (“one shot”) approach popularized by Hitchcock has been adapted, paid homage to over and over since then, which only stands to show how clever the concept was in its infancy. From The X-Files to Birdman to Mr Robot, each new attempt at this concept acknowledges its roots and predecessors then ups the ante and reliance on VFX to create the seamless intended story effect. The most recent entry in this category may be to the 59 minute 3D shot in Long Day’s Journey Into Night.

Don’t be discouraged if something technically difficult requires testing, rehearsal, pre-vis and blocking. A deliberate approach harkens back to my thoughts on Mise en Place for production. When you are able to plan for VFX during production process versus an afterthought, you’re putting they story front and center.

Mr. Robot is unique and well known for capturing accurate technical details about computing and hacking, so it’s no surprise that an immense amount of technical preparation went into creation of the episode with a special focus on the shots and camera movement.


This breakdown video shows everything from general environment clean up, stitching, tracking and compositing of multiple takes. All this is required to create a seamless and invisible shot. Read more from the director of Mr. Robot’s eps3.4_runtime-err0r.r00.

Imagine if Alfred Hitchcock had the same kind of VFX capability. In Rope, Hitchcock wound up re-shooting the ending segments, because he was dissatisfied with the color of the sunset. Today, perhaps he would ask his team environment painters (Digital Matte Painters) to paint and adjust the background accordingly.  


Use Constraints to Elevate Story

Figuring out how to “make it work” in filmmaking is a feature not a bug. Famously there is a story about a director that wanted to shut down an entire freeway for a large multi-car crash scene. With a logistical nightmare of permits, stunt men and traffic the Producer griped “Can’t we just make it a reverse shot in a telephone booth?”

Never has there been a more honest and funny acknowledgement of such constraints than in a movie sequel like the Phil Lord & Chris Miller‘s 22 Jump Street – in which, if you didn’t know, is an entire movie is based on the construct of what a sequel is, and what happens in sequels. It’s fun.

Police Captain Dickerson, played by Ice Cube, makes it crystal clear in this movie, there is no budget for a big police chase like last time. As a reminder, Jonah Hill’s character yells to turn the car “whichever way is cheaper!”

This is called “making it work.” With a wink and a nod, 22 Jump Street opts to make all the action happen off screen.

It’s a funny moment with loud off screen banging and crashing. If this were a large tent-pole movie perhaps there would be hundreds of interior shots of CG robots and equipment being destroyed in real time. As the cars exit the other side of the building, Channing Tatum’s character quips: “Wow, there was a lot of expensive stuff in there.” We’re all in on the joke now.

The next time you feel you have to “show it all” think about these examples of unseen story in VFX, remember your filmmaking roots, commit to the vision, see it through and make something awesome.


Check out this fantastic video showing off some great hidden VFX. Remember, Visual Effects are a tool, just like any other. Don’t be limited in how you utilize them.

David Fincher utilizes Visual Effects to achieve what he cannot in a real-life scenario.

Creating Bullet Impact VFX Assets (Download)

You can download these HD bullet impact effect here

It’s been a while since we last added bullet impact effects to our FootageCrate VFX library, but this update has been worth the wait!

12 incredible new impact assets are a part of our latest collection, with 3 being completely free to download now. You can find the rest of our dust and debris elements here.

Download HD Dust Bullet Impact VFX Assets

These action-packed VFX elements range from 1080p to 4K, meeting the professional standards that you need to make your compositing project stand out. Each is at a consistent 30 fps, and have been pre-keyed to maintain perfect transparency, making it easy to edit them into your shot. Alternatively, you may choose the greenscreen versions which can be downloaded by selecting the MP4 file from the dropdown list.

If you haven’t subscribed to our Youtube channel, we would like to introduce you to our show VFXperiments, where we breakdown the magic behind creating these incredible effects for our community. Our latest episode covers these exciting bullet impact effects!

So now that you’ve caught up with how awesome these effects are, let’s take a look at how we can use them.

The first step is to pick which asset best fits your shot. Is the bullet impacting the floor? Perhaps a wall? Whatever the case, the available variations will meet your needs.

Download HD Dust Bullet Impact VFX Assets

Grab your footage, (in this case I’m using a photo from Pexels.com) and use a compositing software such as Adobe After Effects or Hitfilm and add the bullet impact into your project. If your footage is moving, you can use one of the built-in camera trackers immerse the effect into your video.

Download HD Dust Bullet Impact VFX Assets

Luckily for us, adding these bullet impacts to your video is surprisingly easy thanks to its built-in alpha channel! All we need to do is color correct the layer to match the footage. This can be achieved by applying a tint effect and selecting the colors of the impacted surface as the color to blend into. Making it slightly brighter will then give it the atmospheric-glow that we see in the real world.

Adding some shading can also work wonders! Take a look at the bottom left dust burst for example, where half of the smoke has been covered in shadow. You can recreate this by duplicating the dust burst and having the lower layer darker than the one above. The top layer can then be masked so that only the area in sunlight is visible. This is one of the most effective ways to make your bullet-impact look lifelike!

Download HD Dust Bullet Impact VFX Assets

You can use the tint effect for other scenarios too, with the video covering how to use these impact assets to create an alien sci-fi weapon effect. Additionally, you can tint the footage red to create an instant blood burst!

Download HD Dust Bullet Impact VFX Assets

We’re excited to see what you can create with these bullet impact VFX – get started by downloading them today.

If you’re interested in our other huge collection of assets to fuel your creative projects, check out our tank VFX assets.

How We Increased Our Youtube Subscriber Count

We started our Youtube Channel in 2009, 10 Years ago.

ProductionCrate’s subscriber count is just around 68,000 today. In the last 365 days we have grown by 44,369 subscribers, about 65% of our entire subscriber count. That’s about 9 years of little to no growth, and then an awesome turn of events.

Now, don’t get me wrong, I know we are not a massive channel. We’re not quite at the 100,000 Subscribers mark, or anywhere close to the Gold Play Button’s 1 Million. But we are growing, and most of that growth has happened really fast. I’ve received a few requests asking ‘How do I grow my Youtube Channel?‘ and ‘How do I get More Youtube Subscribers?’ so I figured this was a good time to share what we have learned so far. Keep in mind, this is what worked for us, it won’t necessarily work for all creators!

get more followers on youtube

Format is key. Trust the format.

This is my holy mantra. The words that bring me back anytime my brain goes off on a tangent or if I’m not sure of my next step. You need to develop a format for your channel, show, series, whatever. There is a very direct, very clear connection between our formatted series and our Youtube channel’s growth.

Some of you are familiar with the Saturday Morning Tutorials, a weekly tutorial series we have developed. The first episode went live Jun 8, 2018. Right about the time our subscriber count turned for the better. It was different from other tutorials we have made in one big way, it has a tight format.

By format, I mean a system of steps, rules, branding and consistency that keeps the entire series cohesive. We start each episode off with our title animation and the exact same Voice Over, then jump right into the narrative sketch. After is the Channel’s title animation and then we jump into the tutorial. The series always has the same two hosts, which allows for some ad-lib banter. It has an ongoing story with recurring characters, which connects episodes. We try to shoot with a regular schedule, shooting two sketches in a day and releasing them over the next two weeks, on the same day of each week, and the same time. The system allows us to create faster content but also helps us stay true to the overall concept of the series. If you want to learn more, check out this Making Of video.

In with the Good, Out with the Bad.

We didn’t start the series with an extremely tight format. Things evolve naturally, if something worked, we stuck with it. If it didn’t, it was scrapped and we tried something new. Don’t stick with something if it isn’t working, try a new angle or concept. Saturday Morning Tutorials didn’t start with a title animation or a conscious choice to maintain character arc, those are just things that seemed to work well, and so we made sure to maintain consistency with  them in each episode. Things got progressively better and tighter, and our audience continued to grow. Now we are trying to apply this success to new series, like VFXperiments and Davesplanations, both shows with an active format but still loose enough that we can adapt them as they develop.

Play to your strengths.

Don’t try to mimic another channel’s personality. Adrian and I work together every day, we have developed our own banter and that translates well for the tutorials. Our rhythm works because it is us, if we were trying to mimic Bob Ross we would fail horribly.

You’ll never find success if you’re making content you don’t care about. Follow your interests, passions or curiosity. If you’re bored making your videos, anyone who watches them will be bored too. It will be nearly impossible to maintain consistency and you’ll dread having to edit each one. Don’t do it.

Get Better.

Your audio needs work. You can get better lighting. Your edit can be tighter, or maybe you can let that shot sit for longer. Your workflow is slow or maybe you’re using outdated techniques. Your work will never be perfect. Don’t get cemented in your ways. Keep learning, stay up to date on your equipment, and keep trying new things. If there is one glaring, obvious annoyance you feel about your work then change it. It is too easy to be complacent, you need to be active to grow.

Don’t Burn Out.

Some of our episodes are awesome. We went above and beyond, polishing every cut and fine tuning every scene. Other episodes are just so-so. The latter usually happens when we’re reaching a burn out point. Too much work, not enough passion. If your heart isn’t in it, it’s going to show. For us, we took some time off. We tried new shows, wrote new characters, and found the passion again. It won’t last forever, but that’s okay. We’d prefer to take a moment to fall in love with the work again instead of forcing ourselves to hate it.


Do you have any tips and tricks you use? Or any questions you would like to ask? Disagree with everything I have said or found a bit of value? Let me know if the comments below!

How to Make an 8-Bit Effect

8-Bit is back! You’ve probably noticed the growing popularity of this retro style. We’ve seen it in titles and openers, logo animations, indie games, VFX Shorts and many more. Let’s take a look at how to achieve this style. We’ll be using After Effects but if you’re a Hitfilm User you can find an awesome tutorial here.

We’ll show you how to make this 8-Bit style in AE, but you can also download the preset here

For our effect we chose this aerial explosion from the popular Anime and Toon Category to give it that 8-Bit look.

cartoon explosion assets

Import your clip or effect into After Effects.

A popular technique in AE for achieving the 8-Bit look is by using the Mosaic Effect, but we find it far too difficult to achieve the perfect squares and pixelation needed to pull this effect off. Instead, we’re going to use CC Block Load.


Drag CC Block Load onto your footage. Set the Completion to 0. We set our Scans to 3. For the number of scans, use to your discretion. Uncheck the Start Cleared selection.

Classic 8-Bit games were limited in what colors were available. While our explosion doesn’t appear to have too many colors, we can still limit the variation and add some color degradation with the Posterize Effect.


Add the Posterize Effect to your layer. You will instantly notice some color degradation. Play with the level. Depending on your footage you can find the right look for you. We suggest adding these effects to individual layers but staying consistent with the CC Block Load scan number for pixel consistency.

One additional item you can change is your composition’s framerate. We are going to change our comp’s from 29.97fps to 15fps. To do this you can go to Composition>Settings or just hit Control K (Command K for Mac) and change your framerate there.

learn to make an 8 bit explosion

For the final step we want to get rid of those semi-transparent pixels. This can be done quickly with the Levels effect. Drop the levels effect onto your layer, and select the Alpha option from the drop-down.


Select the Alpha Input White number (32768) and type /2 for (32768/2) and deselect. Now your number will read half of that, or 16384. Copy that number and paste it into your Input Black. Now you have crunched out those semi-transparent pixels!

Now you have your 8-Bit style. Mess around with the Anime FX and see what works best for you.

8BIT AFTER EFFECTS


Want to keep learning? Check out this Bouncey Text Tutorial in After Effects

How To Make Bouncy Text in After Effects!

Ever wanted to know how to make bouncy text in After Effects, per-Character, as quickly as possible? It’s really easy! The Text Animator in After Effects is actually quite easy to customize, with tons of hidden features. This is a great introduction if it is your first time using it.

learn to bounce text

First off, type in your text you want to bounce with the Text Tool (Ctrl + T)

Toggle down the arrow to the left of your text (Box 1 Below)  so you can see the Animate button.

Toggle the Animate Button (Box 2 Below)

Bounce Text per character in After Effects


Select the Position Parameter from the Drop Down (see left)


Note all the other different parameters you can animate here!Opacity, scale, skew, rotation can all be animated independently or all together. For us, we will just use the Position parameter for this tutorial.


After selecting ‘Position’ you will see the Animation Controls (see below image). There you will see ‘Add’ with an arrow similar to the ‘Animate’ arrow. Click that. ‘Property’ and ‘Selector’ will appear, scroll over and click selector and choose ‘Wiggly’. If you are familiar with the Wiggle Expression this is a similar tool specifically for Text Animation.

For now, just select Wiggly, let’s get that text bouncing.

This is another great place to explore around if this is your first time trying the Animator tool for text! Notice the Expression option? There is a lot of powerful uses there, we will return to it in another tutorial.

Notice the Wiggly Selector (1 Box Below) You will see the familiar Position parameter and stopwatch. Next to that you will see the X and Y coordinates. We want this text to bounce up and down on the Y Axis. Let’s Increase that number to something low. 18 Works for our purposes.

If you hit the spacebar and preview you will notice that your text is already bouncing! If you want to customize further, that’s easy. Notice the Range Selector (Box 2, see right image) You can control the End or Start of the bounce on your text.

Use the stopwatch to create keyframes. You can have your text bounce Left to Right or Right to Left easily.

Drop down your Wiggly Selector (see below) for even more parameters you can customize. Change the speed of your bounce by increasing or decreasing your Wiggles/Second. Change your correlation if you want less, more or all characters to bounce together or completely independently. There are many settings here, the best way to learn is to do, find the right animation for your project!

Spaceship UFO VFX – Tutorial

Download HD UFO VFX Assets Here

Whether they’re friendly or not (usually the latter), no Sci-Fi movie is complete without alien spaceships flying over a city. They’re some of the coolest VFX shots out there.

We’re super happy to be introducing these new HD UFO effects, all available for you to download! We even have a free option, so this tutorial is for all of you.

Inspired by Independence day, District 9 and Arrival, we want to show you how you can create your own blockbuster CGI alien spaceship. So let’s get started with the tutorial!

You can use almost any compositing software for this tutorial, whether that’s Nuke, Hitfilm, or Premiere Pro. I’ll be using After Effects!

We’ll first need the city that our outer-worldly visitors will be hanging out over. I’ve gone for the popular choice, New York City! You can download the same image here from Pexels.

Download UFO Spaceship VFX Tutorial

You can apply the same VFX techniques to a video if you would rather use that! If you haven’t yet downloaded the UFO assets, download the effects here.

We can drop our first spaceship into our shot! You’ll find that it’s already looking incredibly realistic without any work needed to be done. FootageCrate elements are all designed to make your workflow as easy as possible!

The first adjustment we want to make is ensuring that the lighting is in the correct direction. You’ll see that the sunlight is coming from the left side of the screen, so if the UFO asset doesn’t match, simply flip it horizontally. This makes the scene seem consistent.

Download UFO Spaceship VFX Tutorial

The next small adjustment we can perform is adding a tint effect. Make both colors match the sky, so that the UFO appears to be distant in the sky. Typically, you’ll increase the tint if the spaceship is larger or further away to give a sense of scale.

Download UFO Spaceship VFX Tutorial

Feel free to go crazy and add even more of our spaceship assets! Once again you can change the tint levels so that the closer spaceships have less of it applied (which you can see in the top right asset).

Download UFO Spaceship VFX Tutorial

If you have buildings that are supposed to obstruct the view of some of these VFX assets like I have here, you can either rotoscope the foreground, or use a simple color key with the sky as the target! We can then use this duplicated layer above our UFO effects to put the buildings in front.

Download UFO Spaceship VFX Tutorial

And it’s as easy as that! In no time we have our VFX UFO invasion underway. Add any final corrections you would like to your scene. I’ve even used our Auto-Cinemabar plugin to quickly create the cinema aspect ratios in a single click!

Download UFO Spaceship VFX Tutorial

We’ll love to see what you create with these UFO VFX assets! If you’re tempted to create your own UFO animations, Pro Users can download our model here.

If you’re interested in more compositing tutorials, check out our Helicopter tutorial.

How to add realistic camera shake in After Effects – Crate’s Camera Shake

Download Crate’s Camera Shake script here (Available for Pro Members)

There’s something unnatural about the well-known wiggle expression. It’s fair to say that this sort of shake is too perfect.

If you watch over a hand-held video recording, you’ll be quick to notice the immense differences between handheld footage and the go-to wiggle expression.

Add Realistic Camera Shake to your Video

While the wiggle expression does create a shake, it’s mathematical, where it smoothly interpolates randomly generated keyframes between intervals of time. In the real world, camera shake has a huge range of factors that can influence it: footsteps, wind, and weight of the camera are just a few!

This is why we have created our After Effects script, Crate’s Camera Shake!

The toolkit can create a fully-realistic camera shake with only the click of a button.

It’s fast, fully customisable, and is packed with features. So how does it work?

We’ve tracked and analyzed several different pieces of footage, all recorded in different scenarios. Earthquakes, running, handheld and more are all part of the bundle to choose from. Once you browse the built-in library of shake presets, you can then apply it directly to your footage. It’s that simple!

If you’re seeking more control, we’ve also included a variety of customisable options to perfect your shake.

Add Realistic Camera Shake to your Video


Amplitude – The strength of the shake.

Frequency – The speed of the shake.

Skip Keys – Reduce the density of keyframes (a value of 2 will place a keyframe every 3 frames instead of 1).

Random Seed – Add more unique randomness to your shake.

Motion Blur – Have the script automatically set up motion blur to the shake.

Auto Scale – The script will calculate the perfect size for your footage so that the shake does not have it drift out of frame.


We’ve also implemented a Jolt for you to choreograph your perfect set of shakes. The Jolt will be applied wherever your timeline scrubber is on your timeline. You can generate a null with the shake or apply directly to your layer.

These can be applied directly into the shake animation wherever you need, and give an impact to your footage. Jolts are perfect for explosions, impactful footsteps, or something rushing past the camera.

Add Realistic Camera Shake to your Video

Crate’s Camera Shake After Effects Script is exclusive for our Pro Users. The Pro Content continues to grow rapidly, sign up today!

We’ll be using this script in nearly every video we create and know you’ll find it as useful as we do.

Want to check out our other scripts? See them here

How to add Snow to your videos – VFX Tutorial

Download HD snow effects for your videos here

With only a few days to go until Christmas takes over, it’s time to go over one of the most fundamental uses of VFX compositing – snow!

Whether you’re shooting a Christmas comedy or a reflective and chilling scene for your film, snow can always help add value to your project. But not everyone has access to weather manipulating machines or industrially sized snow cannons, and so in these cases, we must rely on VFX to composite the snow into our footage.

FootageCrate has a huge library of snowfall effects, ranging from realistic to cartoon styled. Similar to all of our content, these snow effects are pre-keyed, meaning that transparency is preserved when you drop the snow footage on top of your shot without any further hassle! You can take a look at our collection of snow effects here.

Let’s get started with the tutorial! You can use almost any software for this, including After Effects, Hitfilm, Nuke and Premiere Pro!

I’ve taken this stock image from Pexels.com, so if you want to follow along, be my guest and download the image.

How to composite snow VFX into your video tutorial

One step I’ve often seen people skipping is that they don’t add depth to their snow effect. What I mean by this is that it’s quite clearly visible that there’s just a snow effect simply being placed on the footage, giving it a “flat” feel. We’re going to give the snow volume by first creating a solid that matches the colour of the lighter clouds, and making it so that the further away the footage is, the higher the opacity. This can be done through masking or opacity painting.

How to composite snow VFX into your video tutorial

Already we’ve given a nice volumetric feel to the scene. This will look like snow that is too distant to be seen by the camera individually, and so appears like a cloud.

We can now mask out or rotoscope the foreground so that it doesn’t sit behind this fog.

It’s now time to drop the snow effect into our video. I’ve taken two different effects from the FootageCrate website, which is the “snow background” and the “slow snow falling”. I’ll have the first placed behind the foreground, and the second in front of it. This makes it appear as if the subject is sandwiched between the two snow assets so that they feel part of the scene!

How to composite snow VFX into your video tutorial

Apply these snow effects with an add/lighten/screen transfer mode so that the dark halos around the snowflakes are invisible, and admire your now far more chilling scene! You can add further colour corrections to then cool the image with bluish tints.

How to composite snow VFX into your video tutorial

Thanks for reading this tutorial! If you’d like to learn more VFX, take a look at our helicopter compositing tutorial!


Helicopter VFX Tutorial

Download HD Helicopter VFX assets here

Our brand new helicopter assets have landed in the FootageCrate library, giving you the power to create your own stunning action movie VFX!

Over 30 exciting elements are available for you, with some of them being free to download. We’ve made sure the selection covers all of the intense helicopter sequences you’ll need to build the perfect narrative for your project.

The collection includes take-offs, flybys, static graphics and even a spectacular helicopter crash.

Helicopter Crash VFX for your Videos

It’s time to get started with the tutorial, so you can learn how to add these helicopter VFX into your own videos! We’ll be going over the general workflow which covers the steps you need to take to composite all of our helicopter assets. I’ll also be using After Effects today, but you can replicate the steps in almost any compositing software such as Hitfilm and Nuke.

We’ll first need a background, which today will be this beautiful aerial mountain scenery from Pexels, but feel free to use your own!

Helicopter VFX Tutorial Background

Once you’ve created a composition featuring your background, find a helicopter asset that best suits your shot. There’s many to choose from, so you’ll have no trouble finding one that you want. I recommend that you also consider the lighting when deciding which effect you want for your VFX. Here I’ll be using a looping shot from the side:

Download Helicopter VFX Assets

Drop the effect into a new layer of your composition, and position it where you need it. Since the background and the helicopter don’t have matching sources of light, I flipped the landscape horizontally in order to have the light coming from the same direction. This goes a long way when it comes to making sure your effect fits naturally into your scene!

Helicopter VFX Tutorial

The shot is already looking pretty good, but we’ll perform some colour correction to make it perfect. I used a curves effect to lightly decrease the red as well as increase the blue, which matched the chilling tone of the environment.

Download Helicopter VFX Tutorial

No action scene is complete without some background motion blur, which also gives the illusion that the helicopter is moving at great speeds. It also helps highlight the main feature of our shot, so that it stands out from the rest.

Download Helicopter VFX Tutorial

This is the third tutorial in a row which has made use of our ProductionCrate Lightwrap generator, so if you haven’t checked it out already download it here! This tool is an absolute game-changer when it comes to compositing inside After Effects. It takes the colour of the environment and blends it into the edges of the asset, making it seem as though light from the scene is bouncing off our helicopter and into the camera. The default settings will do for most scenes, so hitting “Generate” should do the trick, but feel free to adjust the settings if needed.

Download Helicopter VFX Tutorial

You’ve made it to the end! We now have a photorealistic helicopter VFX effect in almost no time at all thanks to ProductionCrate’s helicopter library. It’s time to add our final colour corrections to give it the cinema-quality tone we want to see (here I had increased the contrast and saturation).

Download Helicopter VFX for your Movie

If you want to learn even more compositing tricks, take a look at our Nuclear Bomb VFX tutorial: